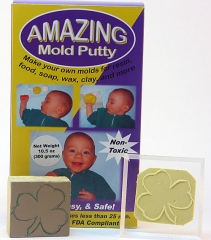
I’ve often longed for a simple way to create my own rubber stamps. There’s always Linocut, and large pink erasers, but I haven’t mastered the thin-cut line yet (as is evidenced by the “scars” in the hand-carved shamrock in the lower left of image), and would like, at times, to have an image outline I can then color in.
I found this box of Amazing Mold Putty (Michaels) in July and wanted to try making molds for polymer clay projects. I love it; it’s fun, flexible, and, as I’ve discovered, versatile. Using the same shamrock stamp I blogged about back in July, I mixed equal parts of putty into a small ball (work quickly, it activates immediately and cures in approximately 20 minutes), squished it into the stamp, inverted the stamp, and flattened it against the ceramic tile I use for clay. I trimmed off the excess and then let it set.
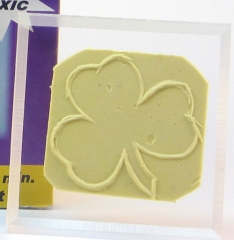
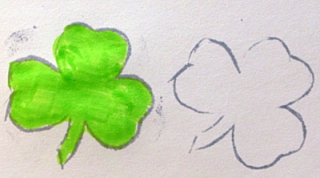
The results were great. Not only does it stamp well with pigment and dye inks (I haven’t tried solvent-based yet), but, as the lower image indicates, it’s self-sticking and adheres beautifully to acrylic blocks (so far, to anything with a shiny surface, including the sticker face of a wood-mounted stamp).
I suspect if one didn’t want to carve linoleum or rubber, one could also use polymer clay to make master plates (er, matrix boards?). Clay plates might even afford deeper, more consistent lines. I suppose we’ll just have to give it a try.
If you use linoleum, carve deeper than I have here. Although it works, the stamp shown is too shallow and requires cleanup around the outer edges. But, as you can see, it still produces a clear, consistent line. Happy stampin’!


